
The objective of this post is to demonstrate creating a MySQL deployment in an open-source Kubernetes environment. This will be the first step in building out a full blown WordPress application in later posts and this will represent the database back end. In this post we will cover Kubernetes concepts such as persistent volumes, persistent volume claims, deployments, services and secrets. So if everyone is ready, lets dive in.
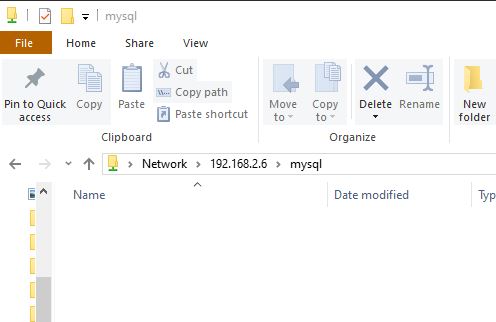
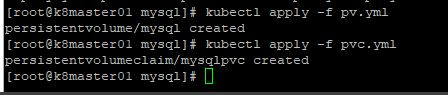
1. Create a persistent volume and a persistent volume claim. Below shows the yaml files to create a persistent volume and persistent volume claim respectively. This particular persistent volume is located on an NFS share with the IP Address of 192.168.2.6 in the mysql location. Since this mysql database is being built for wordpress, this persistent volume will be located in the wordpress namespace. I created a mysql folder on my linux machine to store the yaml files. In a future lesson, these files will be stored in GitHub and triggered from a pipeline.
pv.yml
apiVersion: v1
kind: PersistentVolume
metadata:
  name: mysql
  namespace: wordpress
spec:
  accessModes:
   - ReadWriteMany
  mountOptions:
   - nfsvers=4.1
  capacity:
     storage: 30Gi
  nfs:
     server: 192.168.2.6
     path: "/mysql"
pvc.yml
apiVersion: v1
kind: PersistentVolumeClaim
metadata:
  name: mysqlpvc
  namespace: wordpress
spec:
  accessModes:
   - ReadWriteMany
  resources:
     requests:
       storage: 30Gi
2. Let’s go ahead and create the persistent volume and the persistent volumeclaim. The first screenshot is just my empty NFS location that was created for persistent storage. We then run the “kubectl apply -f pv.yml” and “kubectl apply -f pvc.yml” commands respectively for each yaml file.
3. Now let’s create a secret for our root mysql user. The goal here is to store our passwords securely using the native Kubernetes secrets store. Since we are using yaml files to build our deployments, and these yaml files will be stored in a code repository, we want to make sure that we are not revealing our passwords by simply having someone view our yaml files. First, we will run the following command “echo -n ‘mysqlpassword’ | base64”. This will generated base64 encoded output for our password, which is mysqlpassword.

Next let’s create our secret yaml file and will pass our base64 encoded value to our password data field. I saved the file as secret.yaml
secret.yml
apiVersion: v1
kind: Secret
metadata:
  name: mysqlrootpass
type: Opaque
data:
  password: bXlzcWxwYXNzd29yZA==
Now lets’ run “kubectl apply -f secret.yml” to create our secret named mysqlrootpass. Let’s look at the screenshots below. Notice if we run “kubectl get secret” our secret has been created. Also notice that if we want to see the base64 secret we can run “kubectl get secret mysqlrootpass -o yaml” to see the base64 secret. You must be granted specific permissions to run this command or be an admin. Finally, you can see us run the “echo -n bXlzcWxwYXNzd29yZA== | base64 –decode” command to see our decoded secret as “mysqlpassword”. Running the previous two commands is not necessary to create the secret, but just shows you how to go about retrieving the secret if you need to.


4. Now that we have our persistent volume, persistent volume claim and secrets created, it’s time to create our deployment. Remember, we prefer deployments over just creating pods because deployments are self-healing. If a Pod is stopped or destroyed for whatever reason, the deployment will recreate the pod automatically, and the application will continue running. Let’s have a look at our deploy.yml below.
deploy.yml
apiVersion: apps/v1
kind: Deployment
metadata:
  name: mysql
  namespace: wordpress
  labels:
    app: mysql
spec:
  replicas: 1
  selector:
    matchLabels:
      app: mysql
  template:
    metadata:
      labels:
        app: mysql
    spec:
      containers:
      - name: wpmysql
        image: mysql
        env:
        - name: MYSQL_ROOT_PASSWORD
          valueFrom:
            secretKeyRef:
              name: mysqlrootpass
              key: password
        - name: MYSQL_DATABASE
          value: wordpress
        volumeMounts:
        - mountPath: "/var/lib/mysql"
          name: mysqlpvc
      volumes:
      - name: mysqlpvc
        persistentVolumeClaim:
          claimName: mysqlpvc
First in our deploy.yml file above, we create a label called “mysql”. This label is important because in the next step we will create a service that links to this deployment. We will use that label to tell the service which deployment to connect to.
Next, let’s take a look at the replicas spec. In this instance we are just creating one Pod, so it’s just listed as one, but this could be 2 or 3 if you’re deploying an application that requires multiple instances. The deploy will ensure that there will always be the number of pods running in the replica, this is the self-healing piece I mentioned above.
Under the container spec, we have the mysql image which is simply the mysql image that we download from Docker Hub. While docker hub is the default, this can be configured to pull containers from a private registry if needed. Under environment variables we specify the secret that we created earlier named “mysqlrootpass” and it’s key. This allows this deployment yaml file to be stored without revealing the actual root mysql password.
Finally, let’s look at the volumeMounts and volumes section. Within the mysql container there is a path called /var/lib/mysql. What we are essentially saying under “volumeMounts” is that we want the contents of /var/lib/mysql to be stored in the NFS share mysql, by referencing the persistent volume claim we created earlier called “mysqlpvc”. This is key to creating a container with persistence, because the data is stored on the share even when the container is destroyed. There are a number of options for persistent storage, especially if you’re using one of the cloud based variants of Kubernetes. There is also the option of using storage from one of your Kubernetes nodes, but understand the limitations of this option. If the container moves to a different nodes, it will no longer have access to the storage, so this option is not recommended.
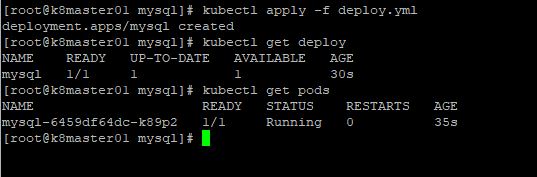
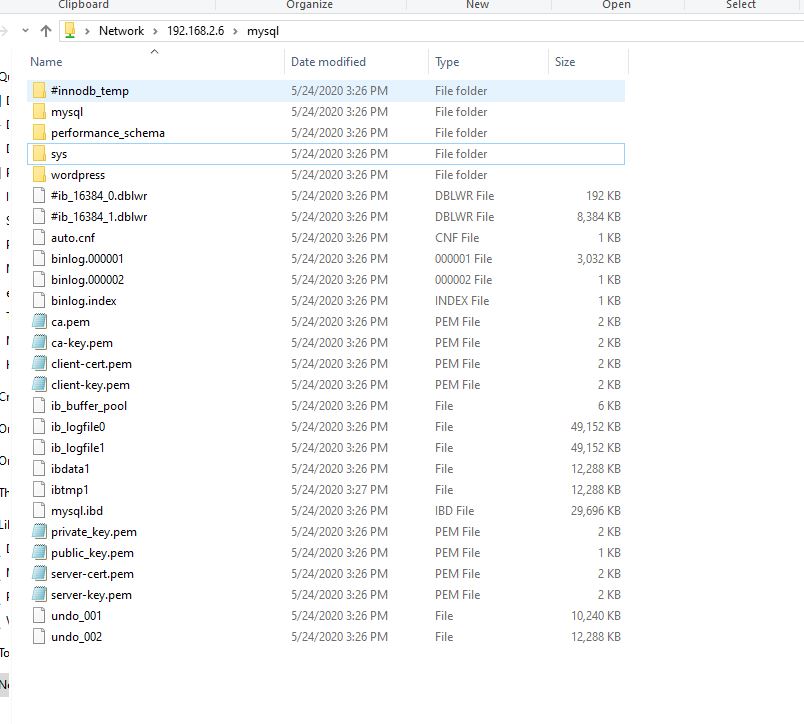
Now that we’ve covered the details of our deploy.yml file, let’s go ahead and create the deployment by running the “kubectl apply -f deploy.yml” command. In the screenshots below we will see the deployment get created, the pods get created and the nfs share populated with the contents of the /var/lib/mysql location.
5. Finally we will create a service that connects to our mysql deployment container. Let’s take a look at the service.yaml file.
svc.yml
apiVersion: v1
kind: Service
metadata:
  name: mysqlsvc
  namespace: wordpress
  labels:
    app: mysqlsvc
spec:
  type: NodePort
  ports:
  - port: 3306
    protocol: TCP
  selector:
    app: mysql
First, notice we create the service “mysqlsvc” in the “wordpress” namespace, as we’ve done with all of our previous .yml files. We create the service as type “NodePort”. This essentially means that to access the service we will use the Kubernetes node IP and a specific port to connect to our container. The external port will get selected upon creation of the service and it will map back to port 3306, which is the port that we will access the mysql container on. Finally, the selector is used to map the service to the deployment based on the label “app:mysql”. Let’s run the “kubectl apply -f svc.yml” command and take a deeper look at the service in the following screenshots.


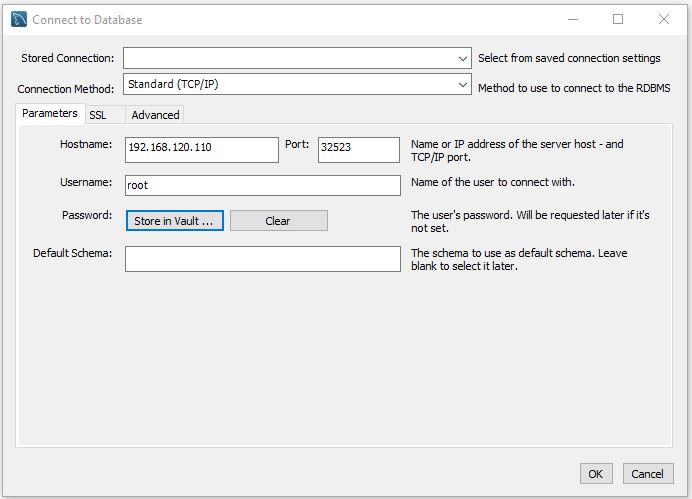
In the first screenshot above, the service is created and dynamically maps port 32523 to port 3306 on the pod. Port 32523 is the nodeport that is represented in the second screenshot. To access our MySQL pod we would connect to the external IP address of any of our nodes, as shown in the 3rd screenshot and the node port, for example, 192.168.120.110:32523. It doesn’t matter if the container is running on a different node than the IP you specify, because if the CNI(container network interface) is configured correctly on your cluster, you will be proxied over to the correct node automatically.
6. Our Persistent mysql deployment is fully up and running on Kubernetes. Now lets connect to it. We will connect to it using MySQL Workbench.
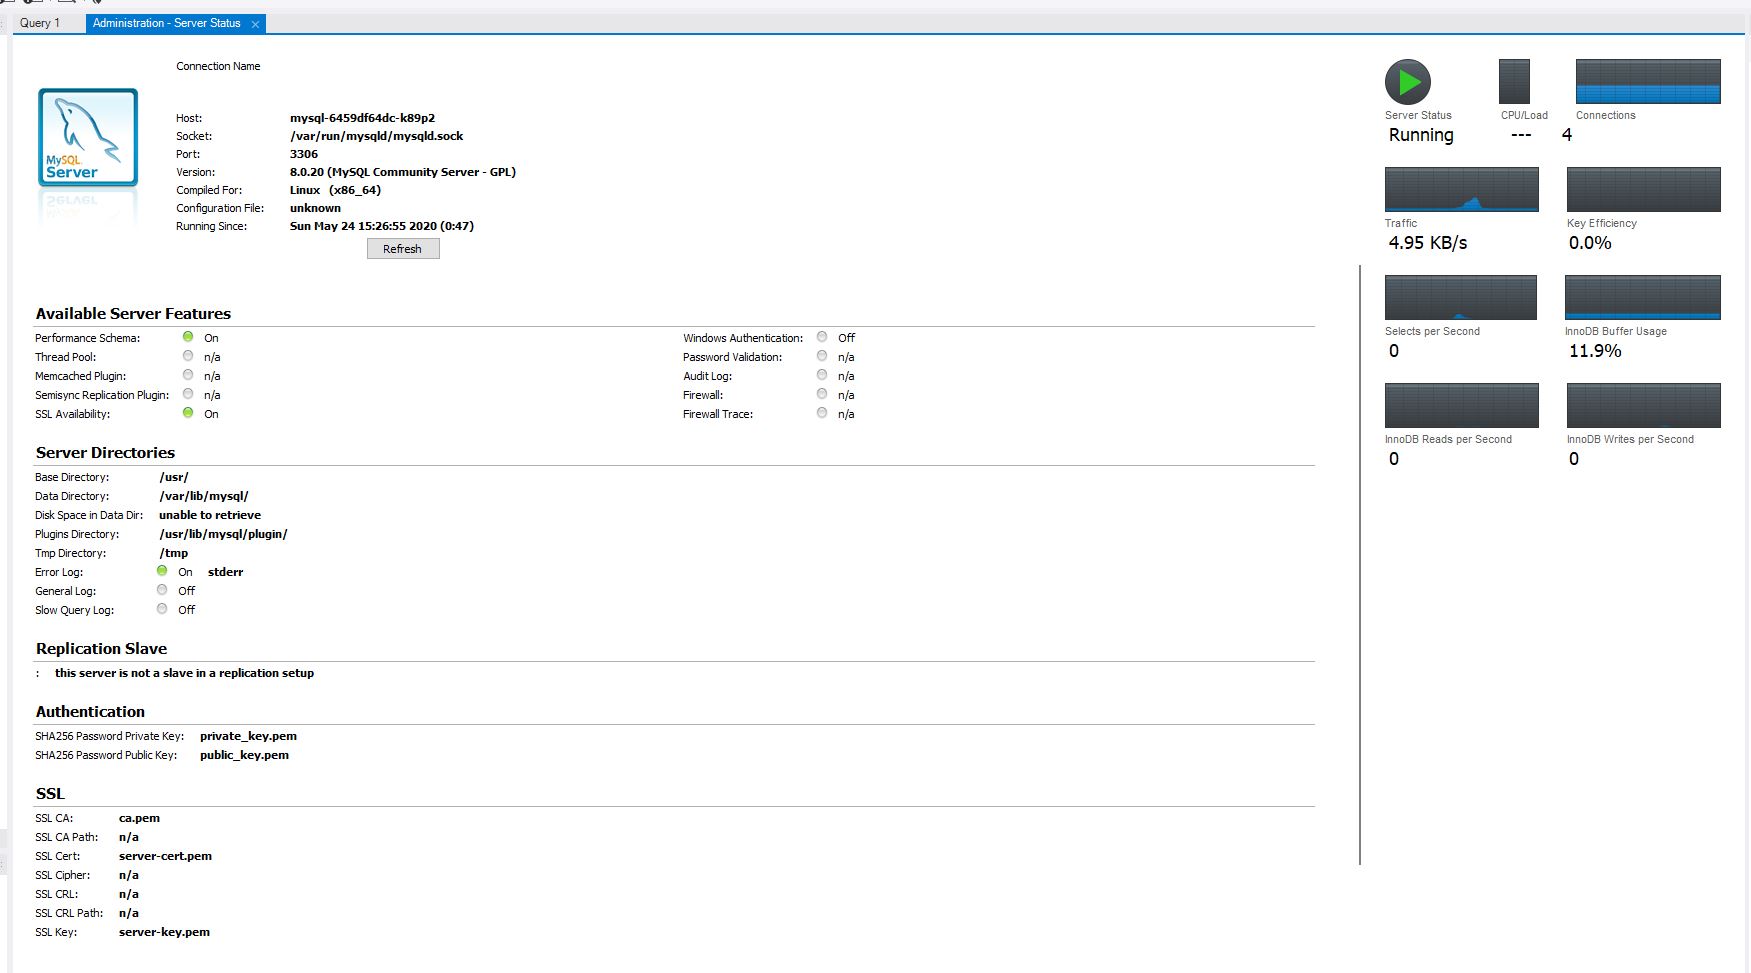
Notice we were able to successfully connect to our MySQL database.
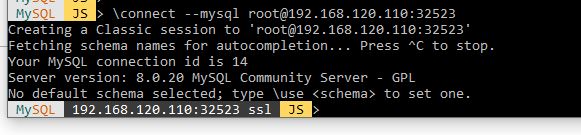
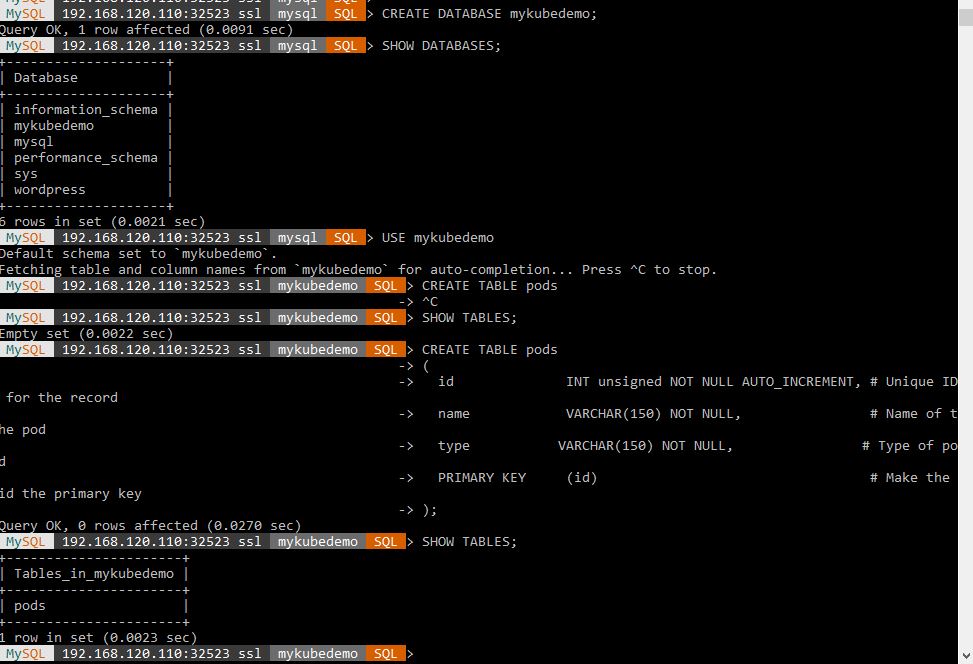
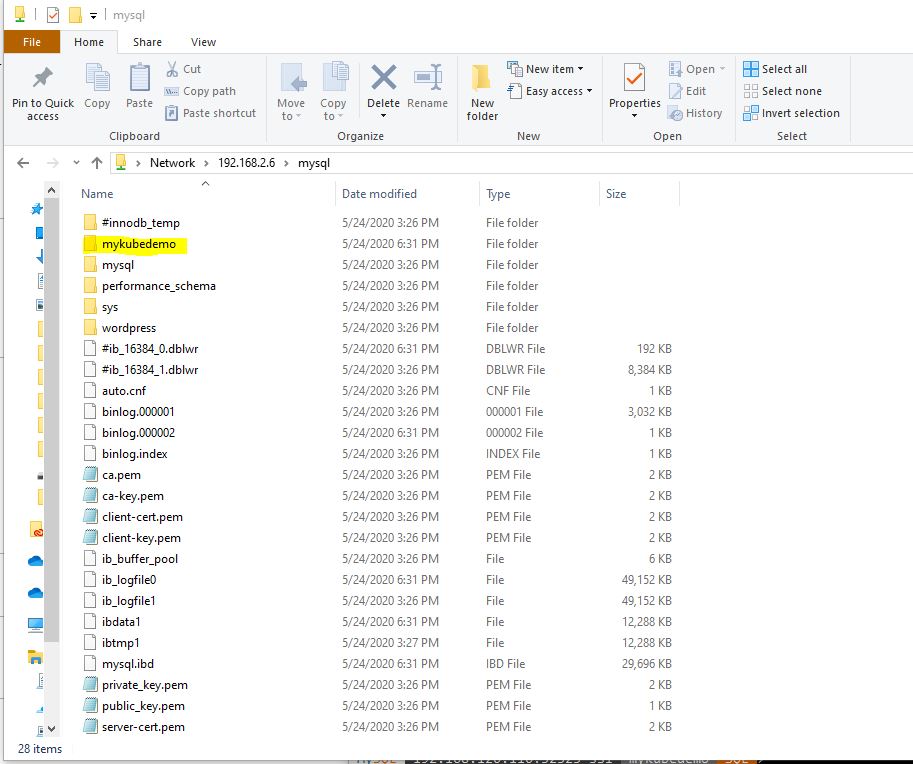
Now let’s connect using the shell. We will connect to Mysql, create a database called mykubedemo, and create a table called pods. Also notice the folder created for the database in the persistent storage screenshot.
7. Now to demonstrate that our POD is persistent. Let’s delete our POD.
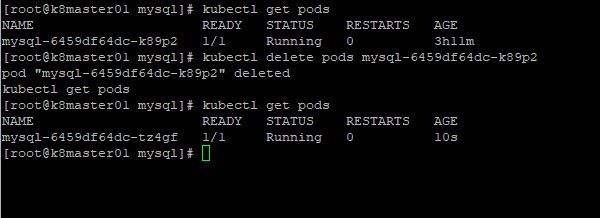
Notice that the name of the POD changed and that the age of the POD went from 3hr11min to 10 seconds. This let’s us know that the deployment immediately created a new pod after deletion.
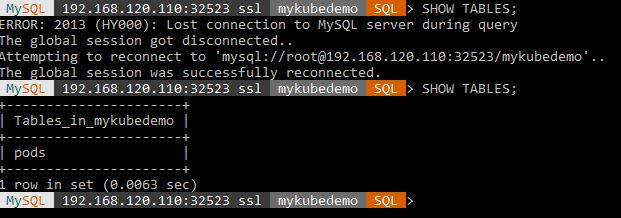
Now let’s go back to our MySQL shell and run the SHOW TABLES; command. Notice that the session was initially disconnected( when the POD was deleted), but then was able to reconnect to the new POD. If I run SHOW TABLES; again, it shows that my “pods” table is still there.
And there you have it. A MySQL container deployed on Kubernetes backed by NFS persistent storage. A similar example and other helpful information is on the https://kubernetes.io/ website, if you need a reference. Hopefully you all found this useful and helpful along your journey to understand Kubernetes deployments and persistent storage Until next time, have a good day.