The objective of this is post is to give a full walk through of the install process for VMware 6.5. We will start by showing the basic manual install process for ESXI 6.5. For experienced VMware professionals, this will be pretty rudimentary. However, if you’re new to VMware or virtualization in general, the basic install process of ESXI may prove useful. We will also cover some basic configuration tasks post install like setting the IP Address and Hostname, as well as creating a DNS record for your new ESXi host. Enjoy!!!
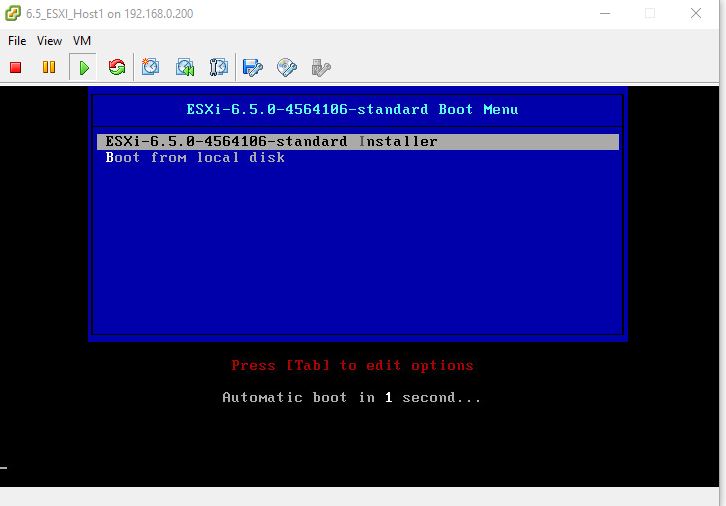
1. Boot from ESXI 6.5 .iso media. Press “Enter” to begin the Install.
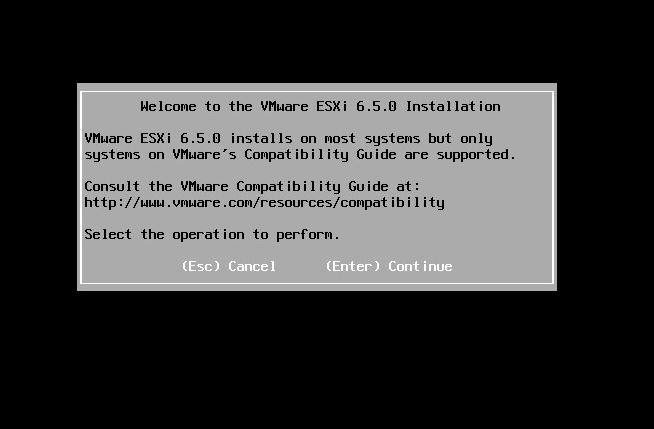
2. Press “Enter” on the Welcome Screen
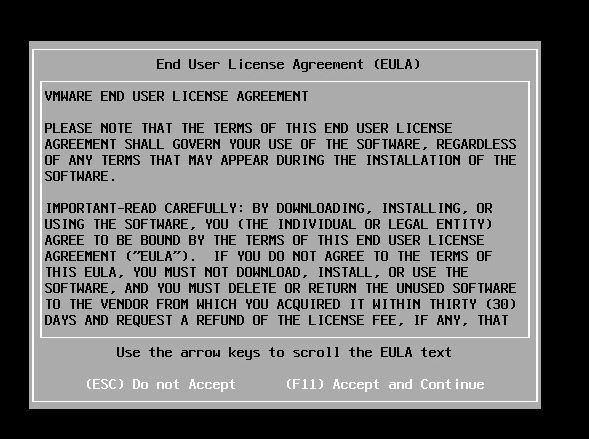
3. Press “F11” to accept the license agreement.
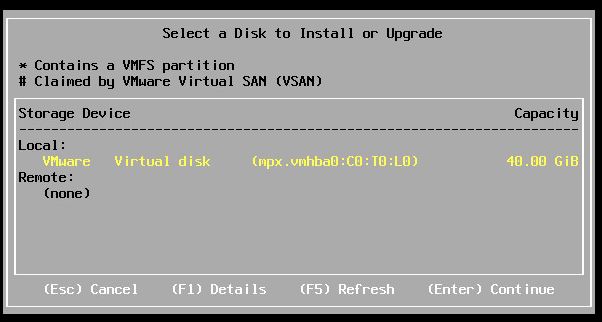
4. Select your storage location for the ESXI install and press “Enter”. In this case we are selecting the 40GB local storage.
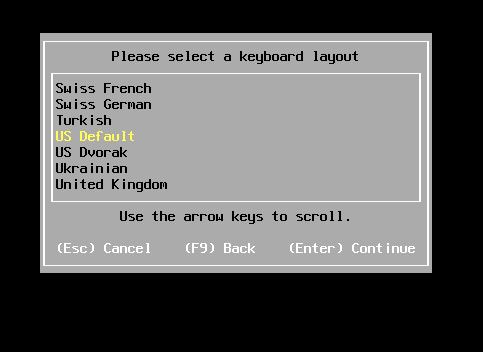
5. Select your language and press “Enter”
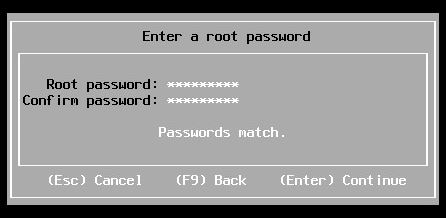
6. Create a root password or leave blank. Once desired password is created press “Enter”.
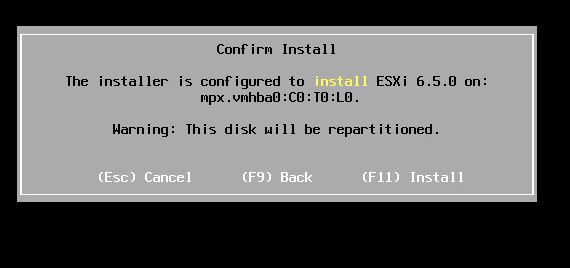
7. Press “F11” to Confirm Install
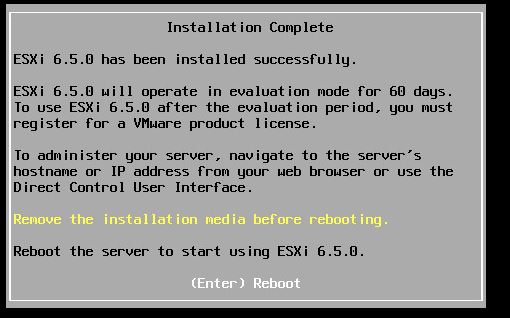
8. Press “Enter” to Reboot Once the Installer Completes.
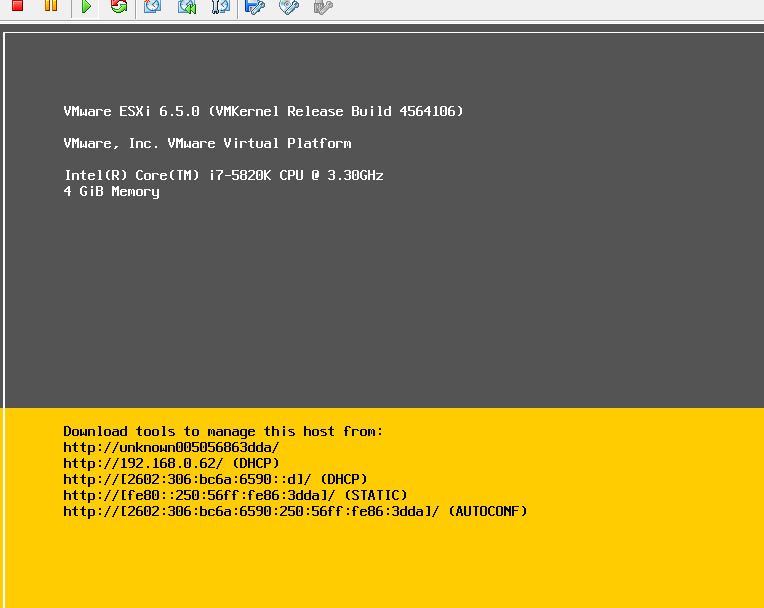
9. If you get a screen like below, then CONGRATULATIONS!!!, you have completed the ESXI install. However, there are still a few housekeeping items left.
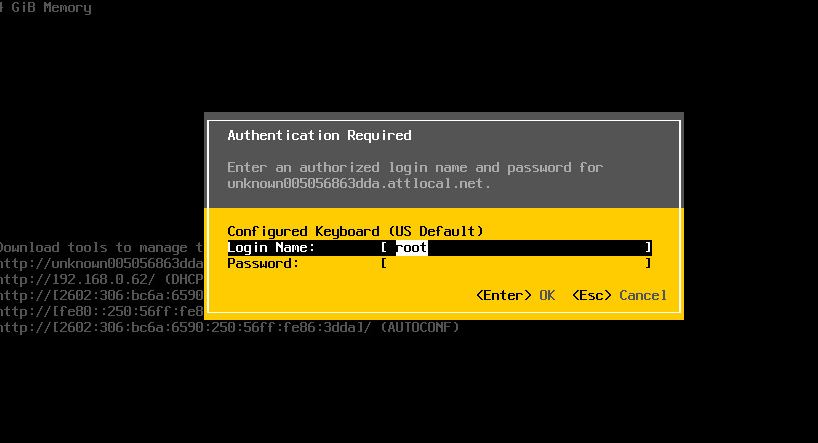
10. Press “F2” to “Customize System/View Logs”. This will prompt you for your password that you set earlier. Enter your password and press “Enter”
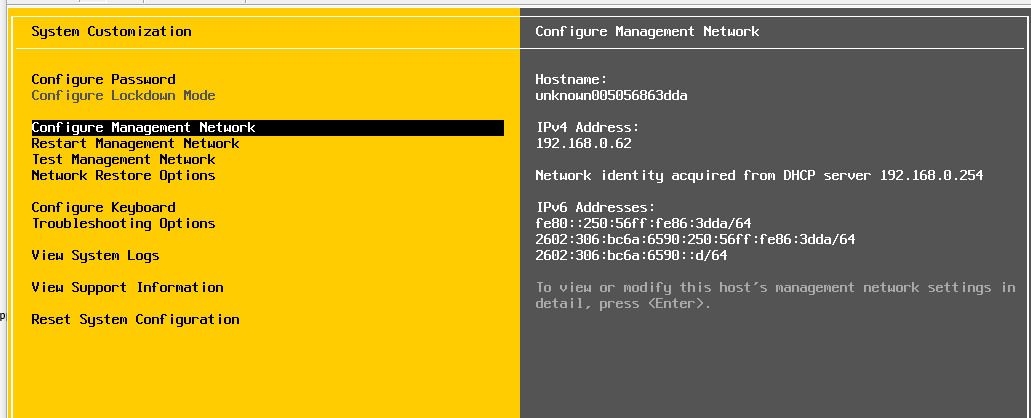
11. From here you will see a “System Customization” page. We can configure a number of items from this screen. We will want to tab down and press “Enter” on “Configure Management Network”
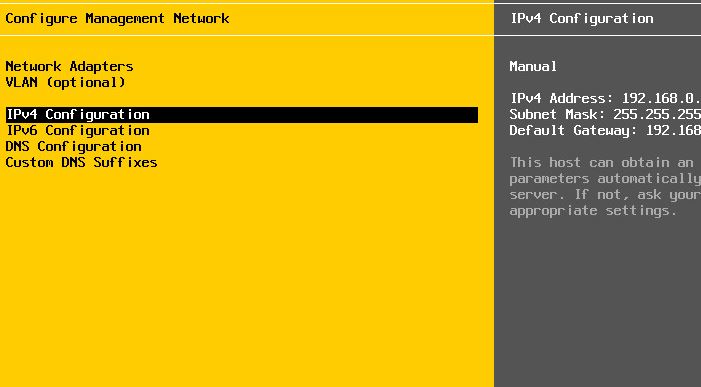
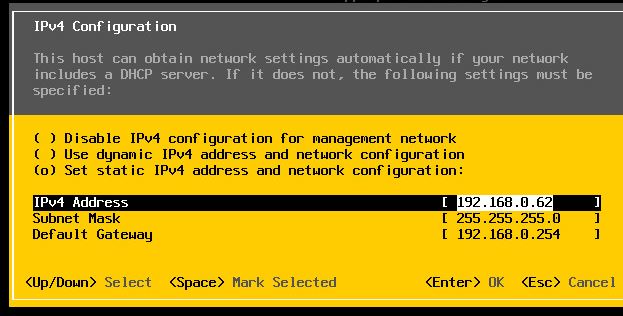
12. This is where we will want to configure the host for basic network connectivity. We have a number of options on this screen of interest. “Network Adapters” will show the physical NICs attached the hosts and the ones that are active. If your host is connected to a specific VLAN we will want to specify this on the “VLAN” tab. Remember, this is just configuration for the management network. In an Enterprise Deployment, we will have different VLANs for functions such as V-Motion, ISCSI and Fault Tolerance, however, all of these functions are configured within the vSphere client or vCenter. However, for this walkthrough, we are just going to configure the IPv4 address of the host, DNS Configuration, and Custom DNS Suffixes. Proceed to press “Enter” on the “IPv4 Configuration” option. Choose the “Set static IPv4 address and network configuration:” option and configure your IP Address on the screen. Press “Enter” when you’re done entering IP Address information.
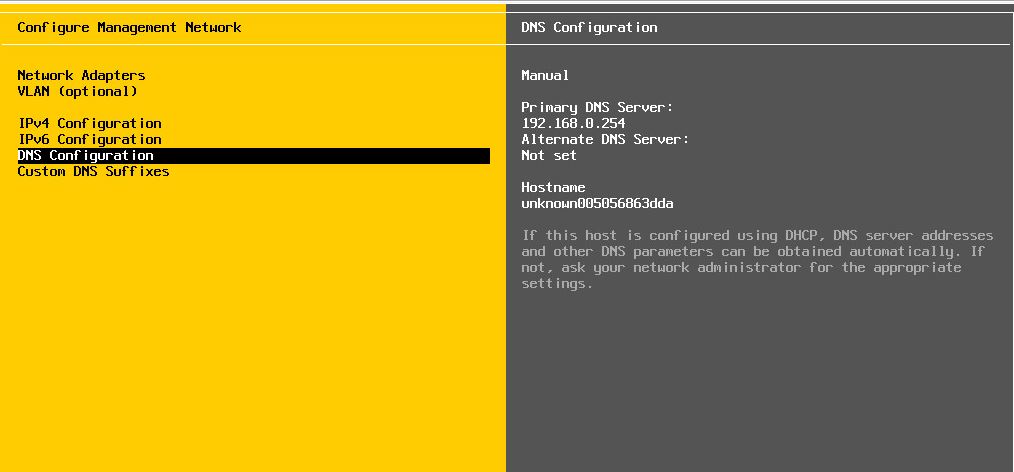
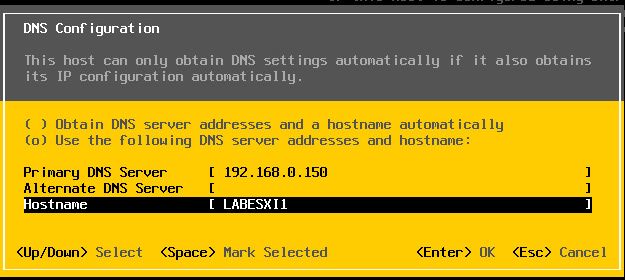
13. Next we will want to scroll to the “DNS Configuration” option and Press “Enter”. Make sure the “Use the following DNS server addresses and hostname:” option is selected. Type in the IP address of your Primary DNS Server, set an Alternate DNS Server if you have one, and give your ESXI host a name, which will be referenced in DNS. In my example, you see that my HostName is LABESXI1. Press “Enter” when done.
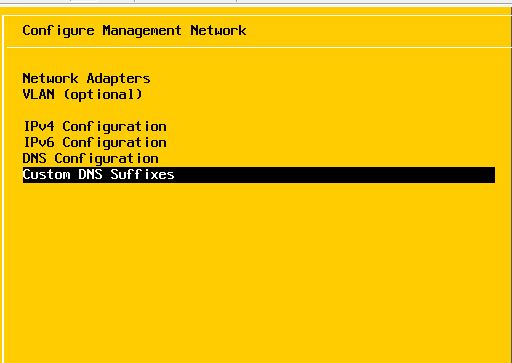
14. Next scroll down to the “Custom DNS Suffixes” option and Press “Enter”. Enter the DNS Suffix for your local DNS domain and Press “Enter”.

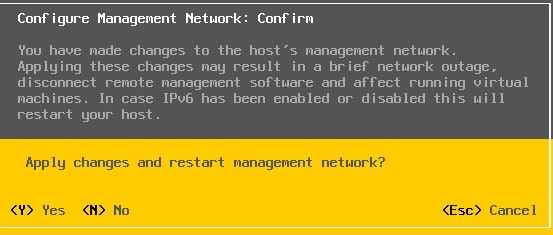
15. Press “Esc” on the “Configure Management Network” page. You will get a box that asks if you want to apply changes and restart management network. Type “Y”
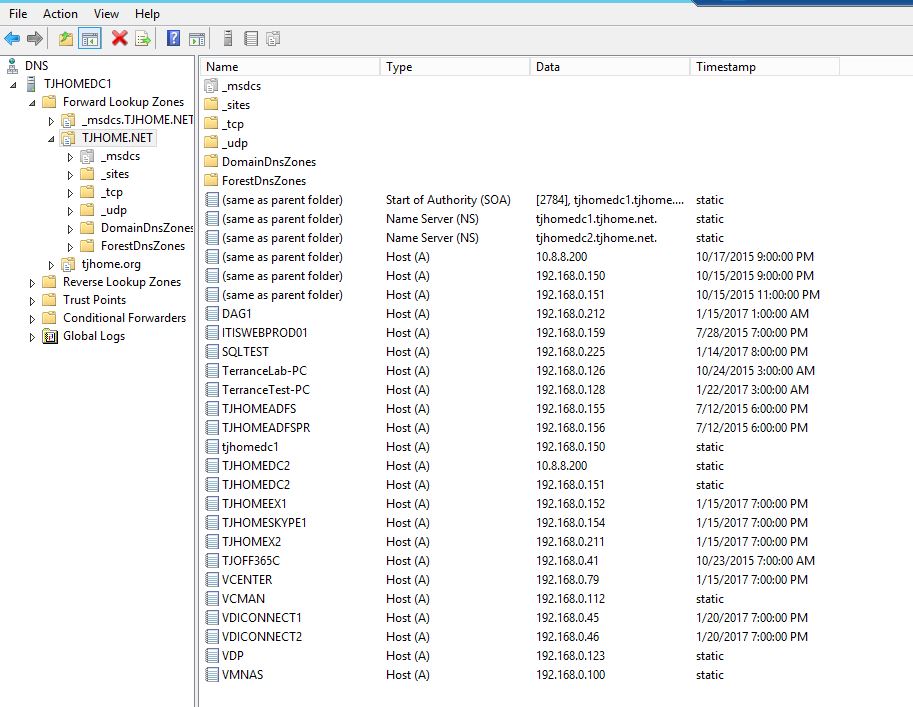
16. Press “ESC” again and this will take you back to the main ESXI configuration screen. This completes the configuration tasks required on the host. To ensure DNS connectivity, we need to add an A-Record on our DNS server. In my example, I will use a Windows Server 2012 R2 DNS server to create the A Record. From the DNS console in Windows, browse to “Forward Lookup Zones” and Browse to your local domain name. In this example, my local domain is “TJHOME.NET”
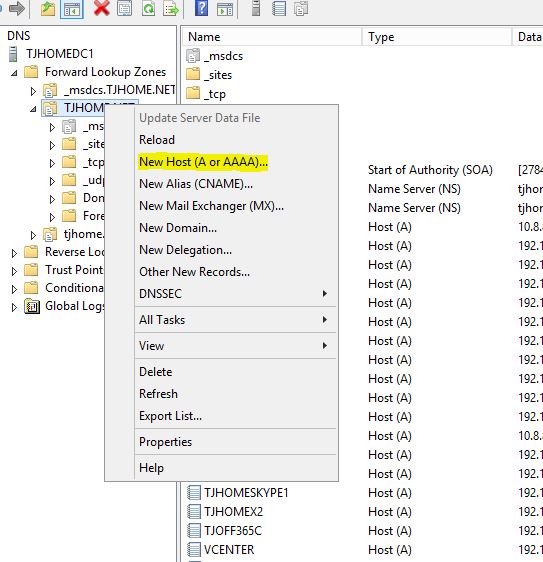
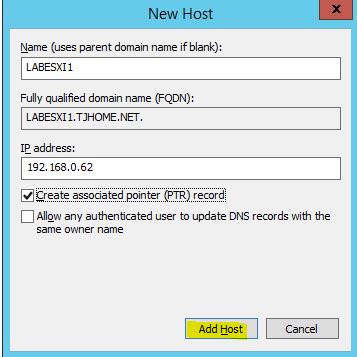
17. Right click on your local domain and select the option for “New Host (A or AAAA)”. Enter the host name and IP Address we entered above for the host. Also check the box to “Create associated pointer (PTR) record” Click the “Add Host” tab when complete.
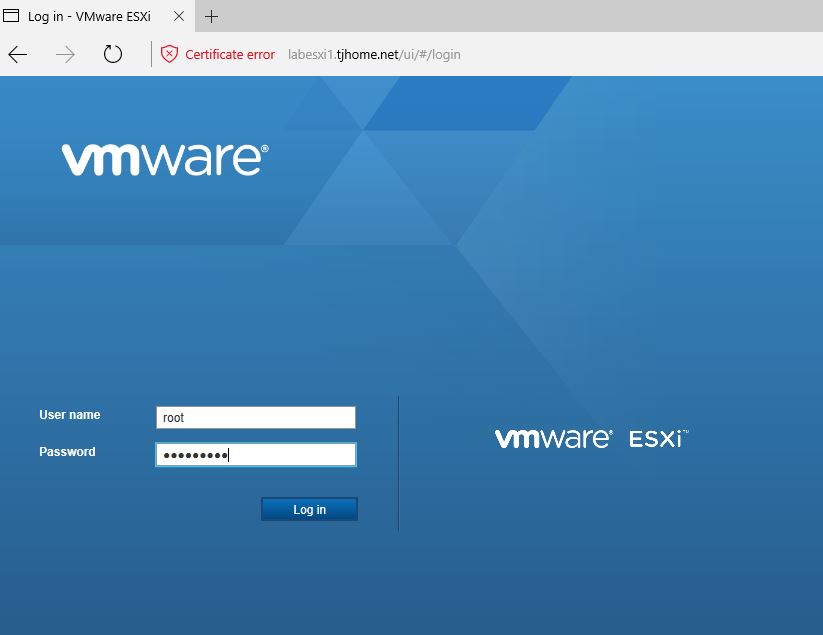
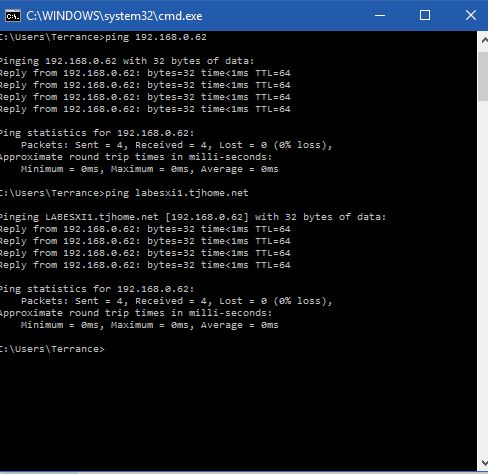
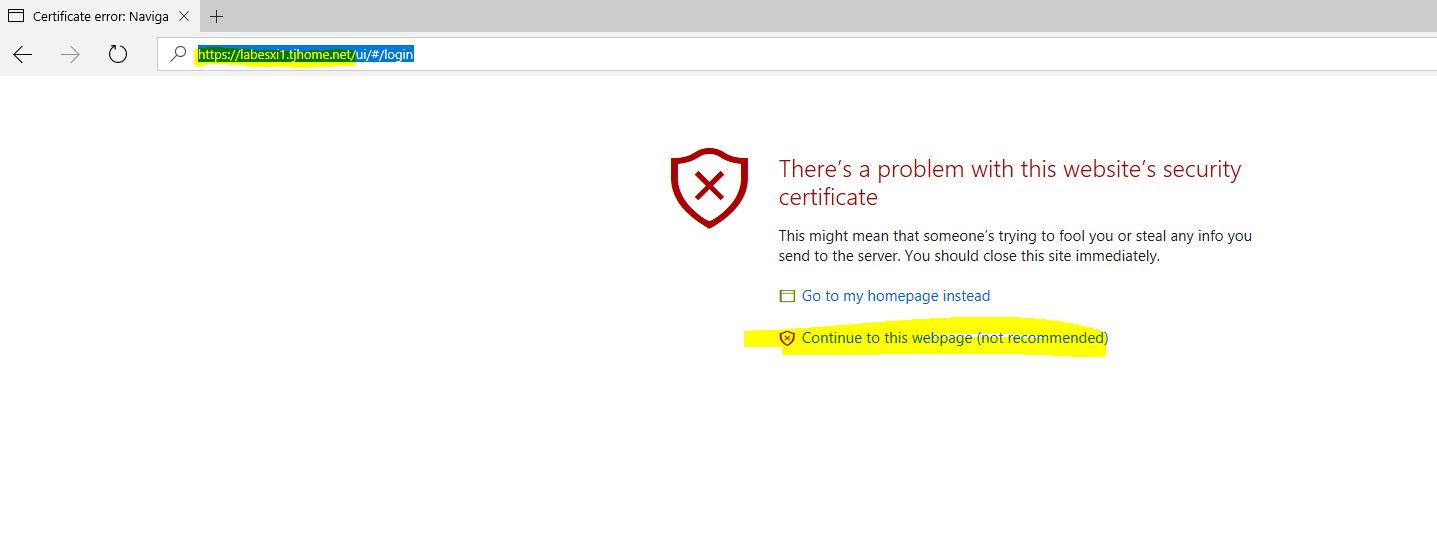
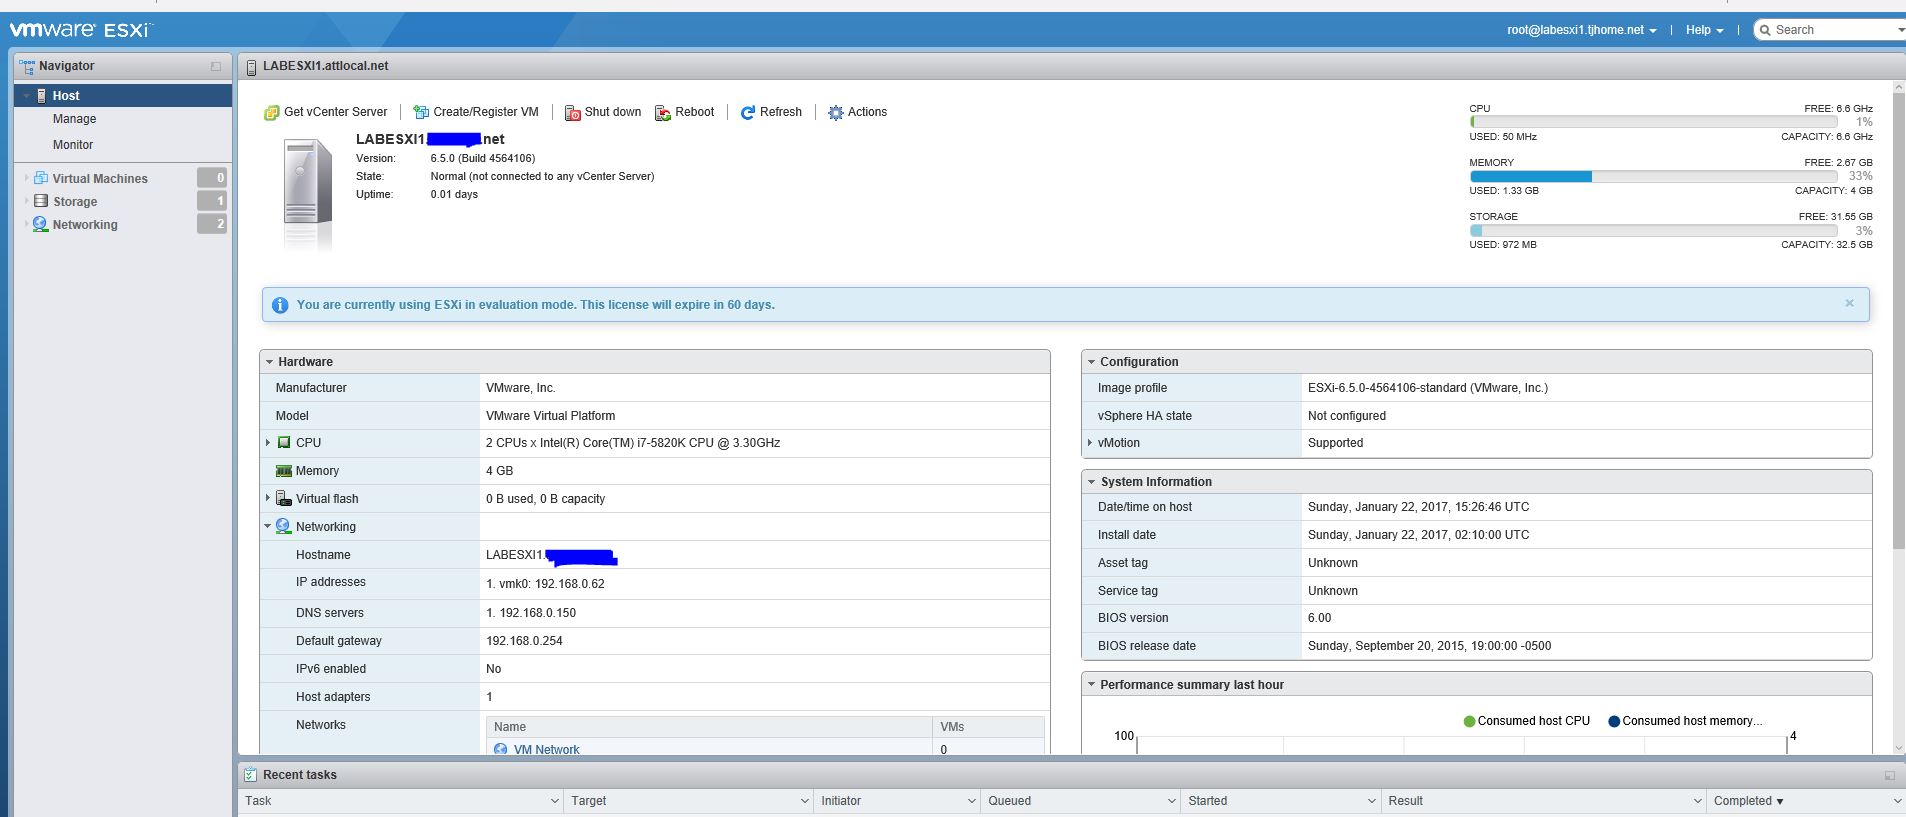
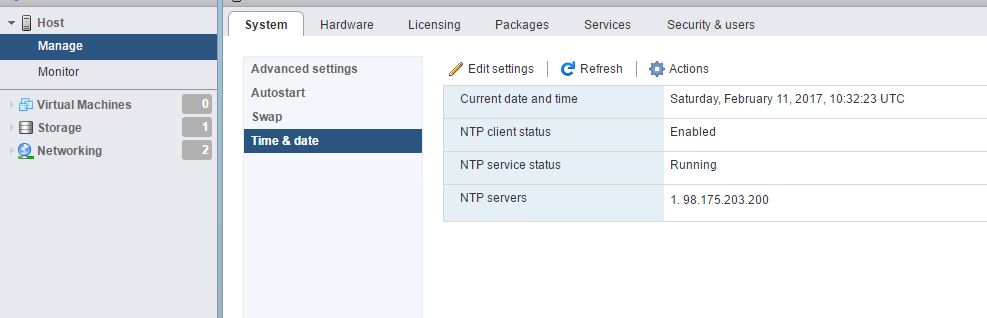
18. At this point our configuration of our ESXI host is complete. There are a number of tests we will want to do in order to ensure that our configuration was successful. First ping the IP address of the host. Second ping the hostname of the host. Finally, open up a web browser and browse to the host by Name or IP Address,(EX. https://YourServer.com). Click “Continue” when prompted with the certificate warning. Those new to ESXI 6.5 will be treated to a new web interface that was not available in previous versions of ESXI. Login with your root user name and password and you’re all set! While exploring your new ESXI host, be sure to configure your NTP settings. It is vital that ESXI have accurate time synchronization. The NTP settings screenshot is in the last screenshot below.
This completes Part 1 on my series for the ESXI and VCenter 6.5 walkthrough. I hope you all find this useful. In future posts, we will show how to automate many of the previous steps using a .csv file, PowerCLI, and PowerShell.