Automation is one of the themes of this blog. Many of you I’m sure are familiar with the sheer amount of power that resides in using Windows PowerShell or PowerCLI if you’re using VMware. And the internet is littered with scripts and examples of PowerShell being used to automate Active Directory, Exchange, Office 365, VMware and many other technologies and solutions. With that said, many of the scripts and examples can be pretty overwhelming, especially if you’re new to PowerShell. Well this post revolves around a single simple command, (import-csv) that can be used across any solution that uses PowerShell as a scripting engine. The idea is simple. Use the data in the file to mass populate information and or objects. But ultimately this should help anyone understand how easy automation can be with these simple commands. This post will show you how to use the import-csv cmdlet to perform the following tasks…..
- Mass Create DNS Records on Windows DNS Servers
- Quickly Update Outdated and Stale Active Directory Attributes
- Quickly Update Security Groups in Active Directory
- Create Microsoft Exchange Mailboxes for Multiple Active Directory Users
- Quickly Create VMware Virtual Machines
1. Mass Create DNS Records on Windows DNS Servers – Ok, your organization just received 200 physical servers, pre-installed with ESXI. We need 300 DNS records created yesterday!!! You can go in and manually create each record one by one, or we can automate it. Here’s how we do it….
A. The PowerShell cmdlet used to create DNS records in windows is “Add-DNSServerResourceRecordA”. The full example of how to use this command to create a single record is below and full information on the use of the command can be found at the following link from the Microsoft Technet website. Add-DnsServerResourceRecordA
PS C:\> Add-DnsServerResourceRecordA -Name “host23” -ZoneName “contoso.com” -AllowUpdateAny -IPv4Address “172.18.99.23” -TimeToLive 01:00:00
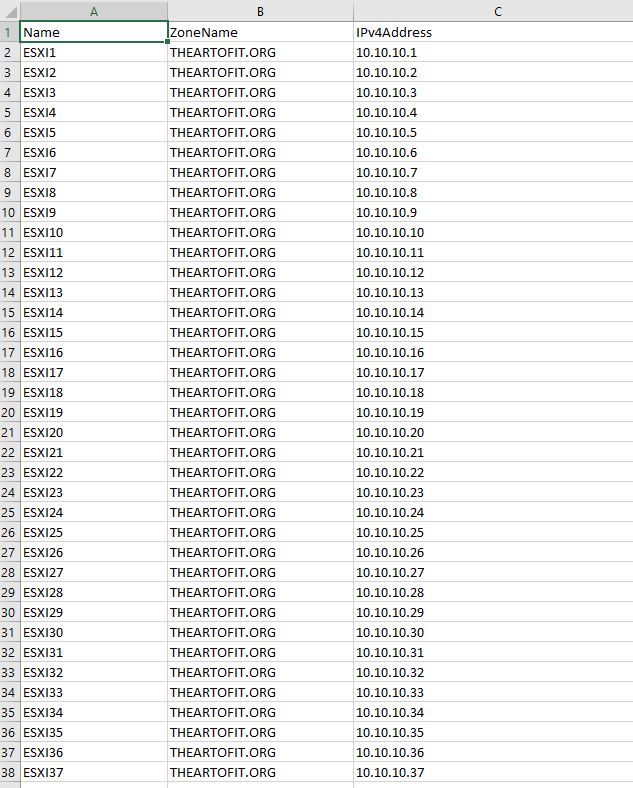
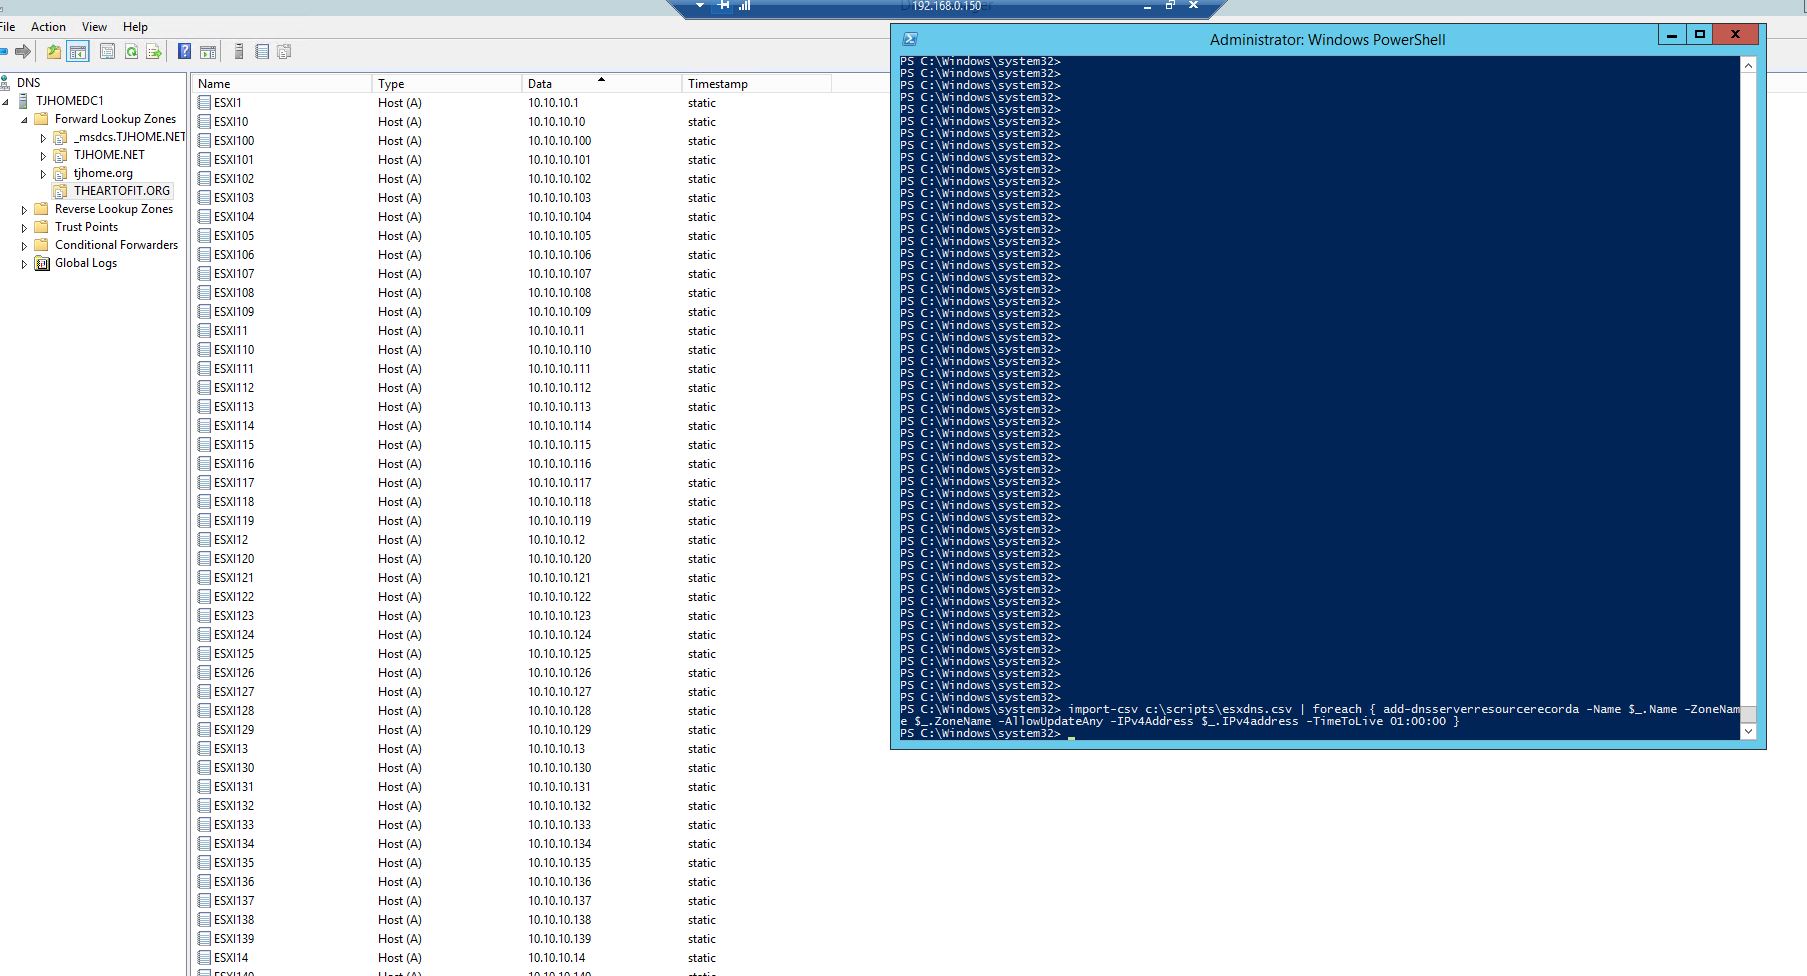
B. Ok, that’s great but this only creates a single record. We need to create 200 and fast! First, we build our .csv file. See screenshot below. Also notice that our headers match the parameters of the PowerShell script. Create as many records as needed. In our case we are creating 200.
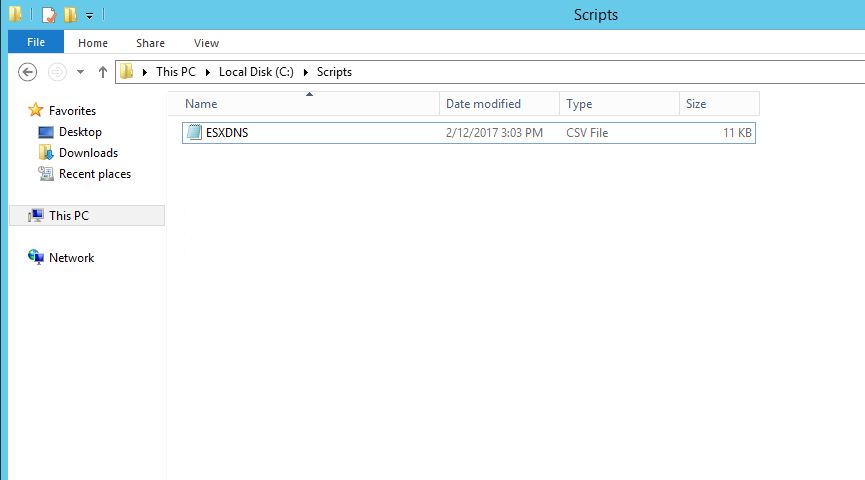
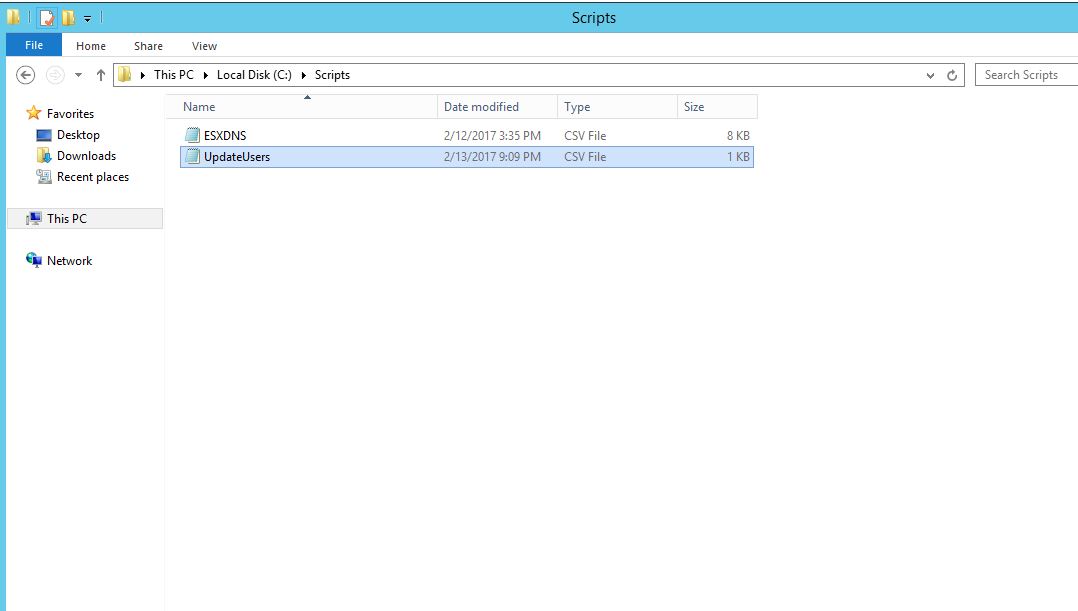
C. When you’re done, save the file to your Active Directory DNS server. I saved my file as ESXDNS.csv to a folder called “Scripts” on the root of C:.
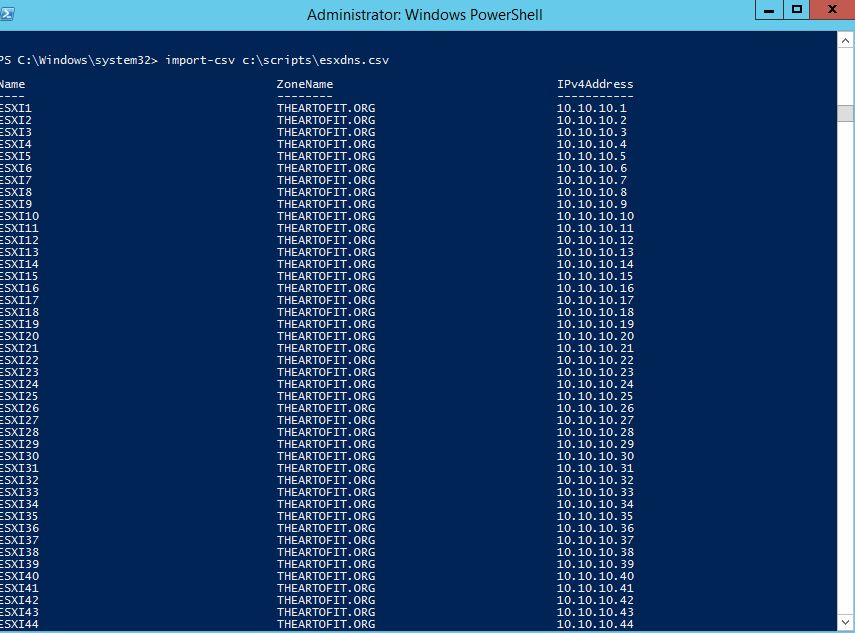
D. Open PowerShell as Administrator. Run the command “import-csv c:\scripts\esxdns.csv”. This simply tests to see if your import-csv file is reading your .csv as expected. If you get errors, be sure to check your command syntax for anything out of place or your file location to make sure it is correct.
E. Ok, now for the fun part. Run the following command to populate your DNS server with 200 new host records.
import-csv c:\scripts\esxdns.csv | foreach { add-dnsserverresourcerecorda -Name $_.Name -ZoneName $_.ZoneName -AllowUpdateAny -IPv4Address $_.IPv4address -TimeToLive 01:00:00 }
And just like that, we have 200 new DNS records. Let’s quickly break down the command. First, we imported the .csv file and pass (piped) the file through to our cmdlet. Inside the brackets we have our cmdlet and parameters. The required parameters are listed designated by the “-” and are “Name,ZoneName,AllowUpdateAny,IPv4Address,TimeToLive”. Following the parameters are values for the parameters. Anything that I wanted to be used from the .csv file we use the “$_.” designation and the header that resides in the .csv file. If I just wanted the same value applied to all 200 records, such as “TimeToLive”, I just enter the information explicitly. Technically I could have done this for ZoneName since all records were using the same zone, but hopefully this illustrates the point. As you will see in the following examples, this simple command with a .csv file can be used in a wide variety of scenarios that use PowerShell as the scripting engine.
2. Quickly Update Outdated and Stale Active Directory Attributes – Ok, so you manage an Active Directory environment that rarely gets updated. Jane used to work in Human Resources but now she works in Marketing. Bob has been with the company for 15 years and have had more titles than you have resources to keep up. As employees move around, many Active Directories that don’t have some sort of identity management tool in place can simply become a mess. However, if we can get a spreadsheet with users, departments and titles, ( hopefully someone in the organization has an accurate description of where people work), then we’re in business.
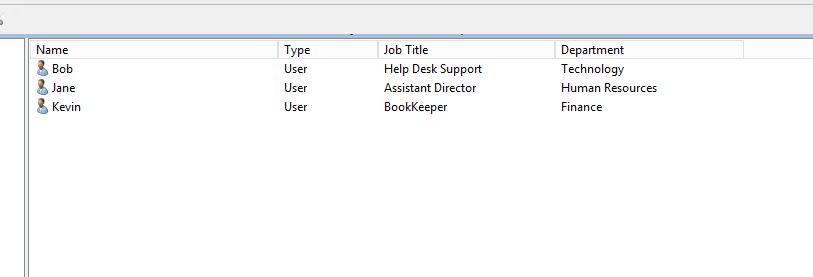
A. See the list of our existing users in Active Directory and take note of their Title and Departments.
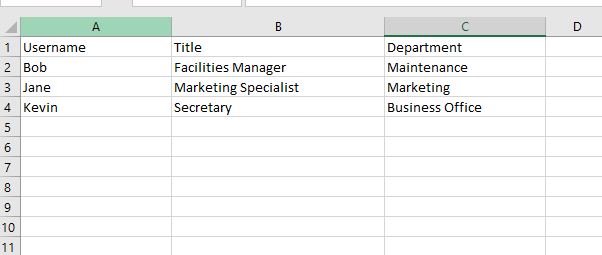
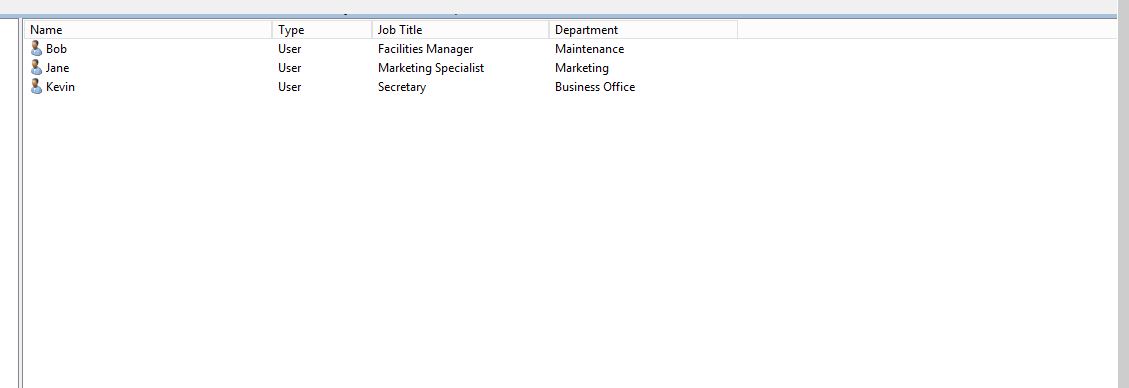
B. Now let’s look at our updated spreadsheet we received from human resources.
C. Now we simply save this file to one of our Active Directory Domain Controllers. I saved the file as C:\Scripts\UpdateUsers.csv.
D. Open PowerShell as an Administrator on your domain controller and run the following commands.
import-module activedirectory
import-csv c:\scripts\updateusers.csv | foreach { set-aduser -identity $_.Username -Title $_.Title -Department $_.Department }
F. And just like that, all of our users have correct Job Title and Department information.
So in this example you notice an extra command to import the Active Directory module. You may or may not have to perform this step depending on the version of server that you are running. But literally two lines of PowerShell code and your Active Directory cleanup is done, well at least this part anyway. This method can be used to update literally any Active Directory user attribute. A full set of parameters for the set-aduser cmdlet can be found from the Microsoft link listed here. Set-ADUser Cmdlet
3. Quickly Update Security Groups in Active Directory – In this example, we will use the same set of users and the same .csv file from the last example to populate a security group in Active Directory.
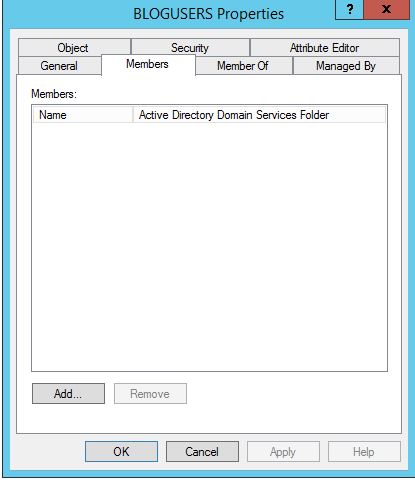
A. So we have a security group named “BLOGUSERS”, that currently have no existing members. We will add our users Bob, Jane and Kevin to this group.
B. Open PowerShell as an Administrator on your domain controller and run the following commands.
import-module activedirectory ( Note: If you’ve already imported the Active Directory modules in your PowerShell session, you will not need to reimport the modules. )
import-csv c:\scripts\updateusers.csv | foreach { add-adgroupmember -identity BLOGUSERS -members $_.Username }

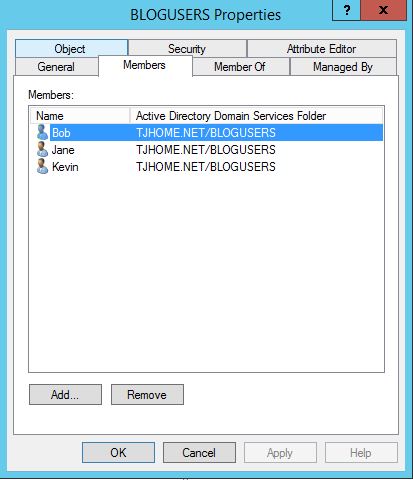
C. Now our “BLOGUSERS” security group is fully populated. You can reference the Add-ADGroupMember cmdlet from Microsoft for a full set of cmdlet paramaters.
4. Create Microsoft Exchange Mailboxes for multiple Active Directory Users – Switching gears a bit from Active Directory to Exchange, we will now enable Mailboxes for Bob, Jane and Kevin in our Exchange environment. In this example, we are using Exchange 2013.
A. Login to you Exchange server and open the Exchange Management Shell as an administrator.

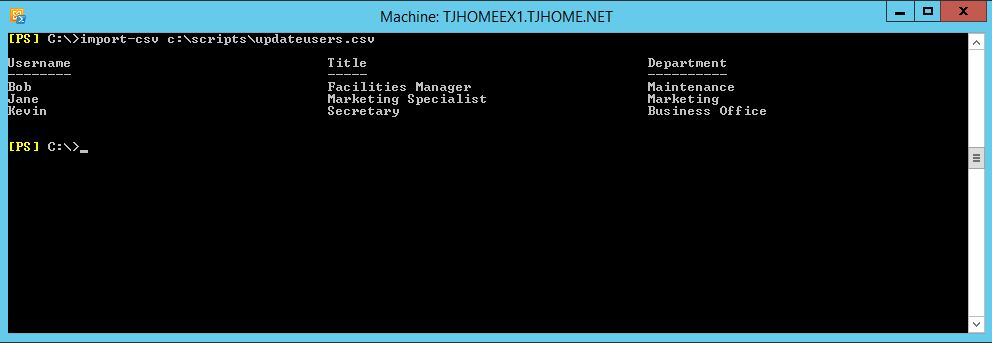
B. Copy the list of users from the .csv to your Exchange Server. You can see the list of users in our .csv file by running the same “import-csv” command from the Exchange Management Shell.
C. Run the following command from the Exchange Management Shell
import-csv c:\scripts\updateusers.csv | foreach { enable-mailbox -identity $_.username -database “DBDAG1” }
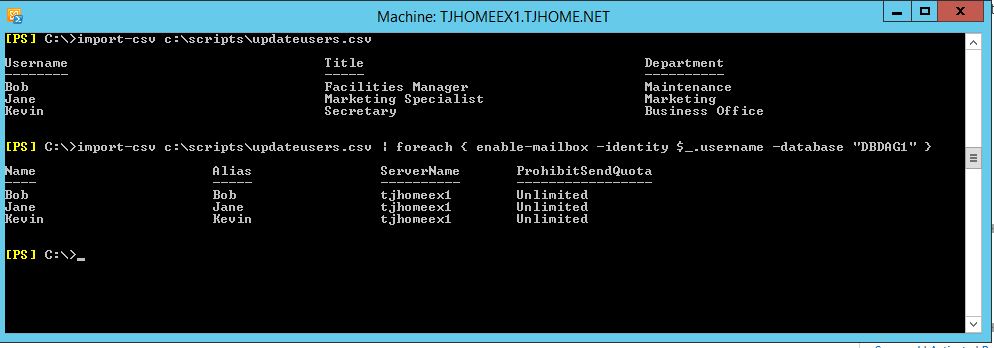
Now we have created Exchange 2013 mailboxes for our 3 users. See the Enable-Mailbox cmdlet from MIcrosoft for a full list of parameters.
5. Quickly Create VMware Virtual Machines – So in our previous 3 examples, we updated attributes, security groups and created Exchange mailboxes for our three users Bob, Jane and Kevin that resided in a csv file. Now we will really shift gears and create 3 new VMware virtual machines from the same .csv file, with a few additional VMware specific modifications to the file. Again, what I’m really trying to drive home is how a single technique can be used across many different platforms to accomplish many different tasks.
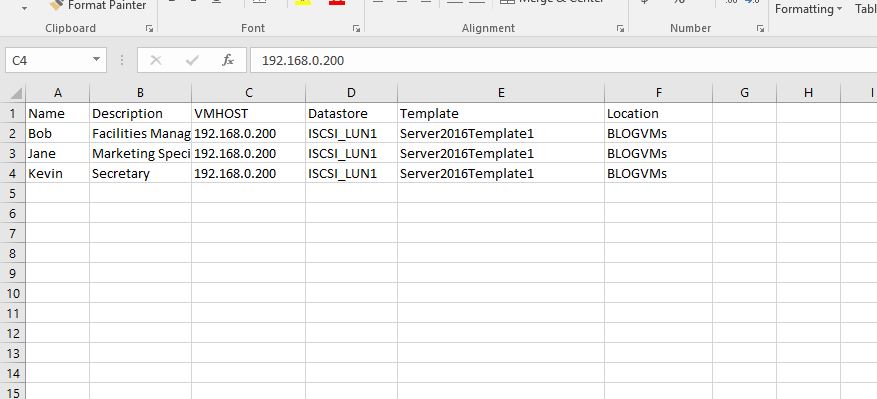
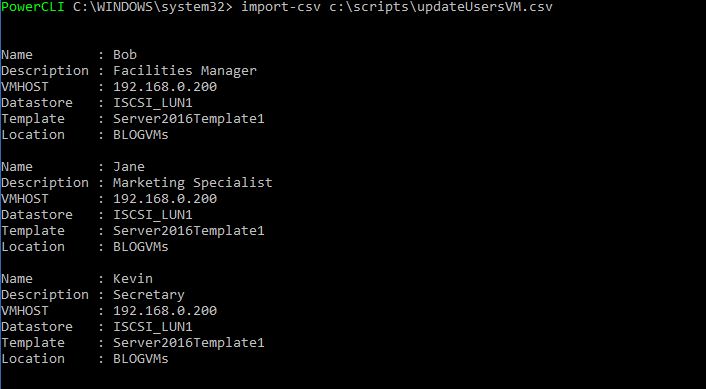
A. First we will update the .csv file to reflect VMware specific settings. I went ahead and renamed the file that I’ve been working with in the previous examples to “UpdateUsersVM.csv” in the scripts folder for clarity.
B. Now let’s open our .csv file. If you take a look, we added several new VMware specific columns like VMHOST,DATASTORE and TEMPLATE. So in this example we will create VMs with the names of Bob, Jane and Kevin that will be created on the “ISCSI_LUN1” datastore, on the vmware host with an address of 192.168.0.200 in the BlogVMs folder. We will also specify an existing template for Windows Server 2016.
C. Next I will launch PowerCLI form my client machine as administrator. PowerCLI can be downloaded from the VMware website if you do not already have it installed.
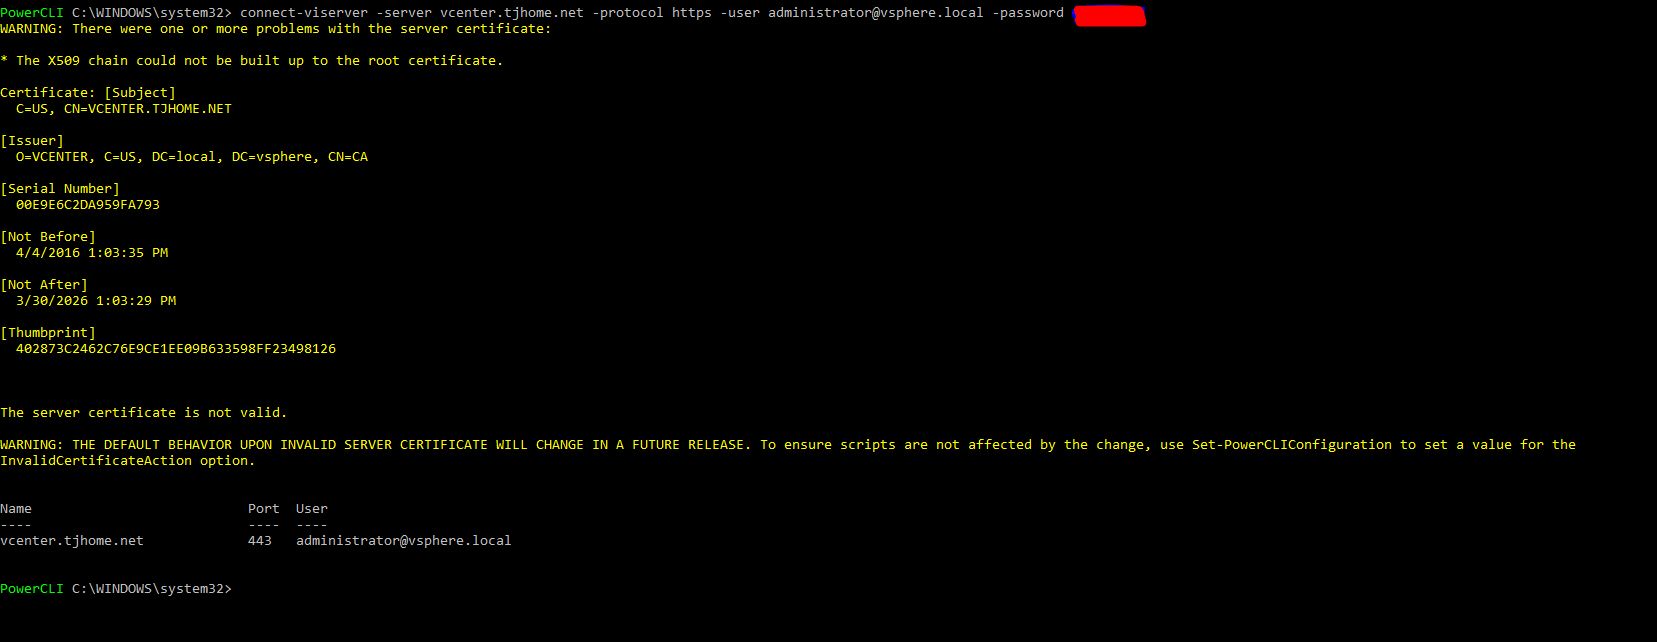
D. Run the following command to connect to your VCenter Server.
connect-viserver -server YourVCENTERSERVER -protocol https -user [email protected] -password YourPassword
E. Like in previous examples, running the import-csv command reveals the contents of our .csv file in PowerCLI.
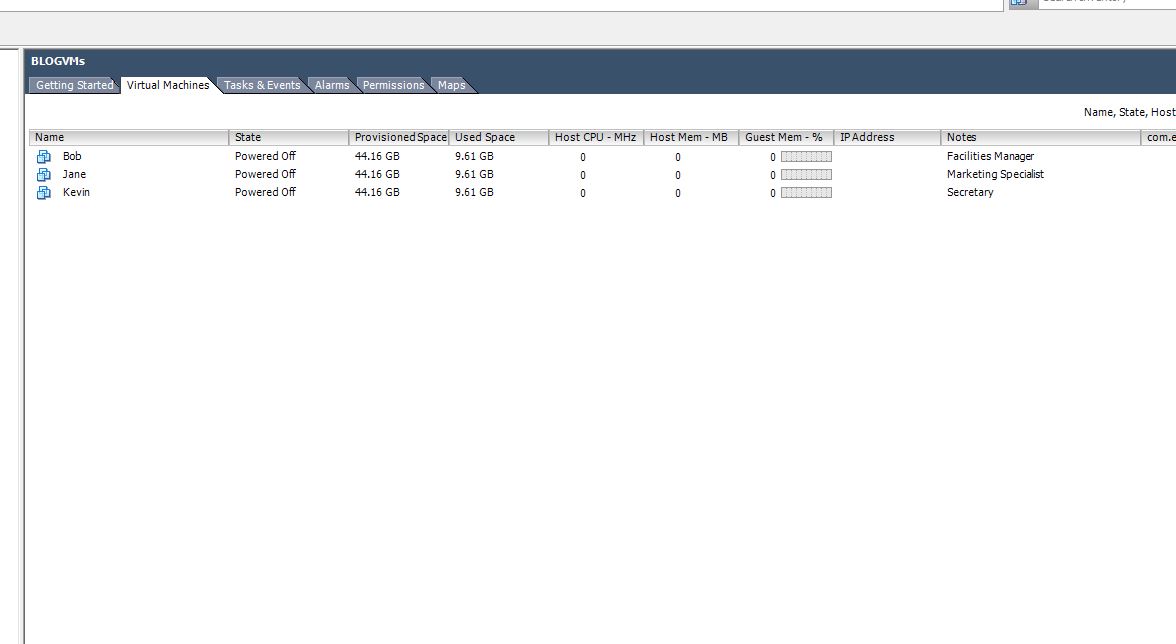
F. Run the following command to build new VMs from the .csv file specified. You can see that the VMs are being cloned from the Shell and from the vSphere Client.
import-csv c:\scripts\updateUsersVM.csv | foreach { new-vm -Name $_.Name -Description $_.Description -vmhost $_.vmhost -datastore $_.datastore -Template $_.Template -Location $_.Location }


G. The command completes and we now have 3 newly created virtual machines. Take notice that the “Notes” section reflect the description of our VMs. See the New-VM article from the VMware website for a full list of parameters that can be used with the New-VM cmdlet.

This concludes this post on “5 Easy examples of Using PowerShell with CSV Files.” We created DNS records, updated Active Directory attributes, updated Active Directory security groups, created Exchange Mailboxes and created VMware virtual machines all from a simple .csv file. These steps can provide a methodology for automation within your IT environment. By simply providing departments, developers and business units with an excel document, we can easily generate and update objects on a large scale. Hopefully you all find this useful and thanks for reading.